
Hostgator is one of the most cost-effective web hosts on the market. Others can be cheaper, but they always come with caveats. Either extremely limited storage, a cap on the number of databases, unrealistically low bandwidth limitations, or more. Hostgator on the other hand gives you solid, basic hosting with no frills. It’s not fancy, but it works. Here are 5 tips to get the maximum value out of buying Hostgator hosting.
1. Get a Hostgator Coupon Code from WP-Tweaks.com
While the prices displayed on the Hostgator homepage itself are much lower than what you get from others like Bluehost, you can do even better. Hostgator offers a variety of coupons that are more diverse than any other web host. It has different codes for each package, and billing cycle. Finding the one that gives you the best discount can be both challenging and exciting!
Luckily, Bhagwad Park over at WP-Tweaks.com, can help you find the best Hostgator coupon code for your needs. There, you can find coupons that are unavailable on the Hostgator website, as well as special codes that are time limited. While WP-Tweaks.com offers discounts from all web hosts, it’s a particularly good source for Hostgator coupons. So if you haven’t yet bought your hosting, find the best one and get the lowest price you can manage.
2. Host jQuery from a CDN like the Google Library
Google’s recent Core Web Vitals update has made page speed even more important than it was before. As a result, you’re under a lot of pressure to defer your JavaScript and CSS files. Unfortunately, it’s not easy to defer jQuery – too many plugins depend on it, and you risk breaking your website entirely if you try and postpone jQuery loading.
This is made worse if you’re on a low-cost hosting plan. When you buy Hostgator hosting, it means you need to reduce the load on your server as much as possible. The recommended solution according to Hostgator, is to load jQuery from Google libraries – or at least some other public CDN. This increases the chances that your visitor will already have your version of jQuery in their web browser and thus will spare them from having to delay page loading by downloading it. As you probably know, jQuery in the header is render blocking, and can seriously impact your page speed if you don’t take countermeasures.
Loading jQuery from a public library is essential if you’re on a Hostgator plan.
3. Use a CDN Without Domain Lookups like Cloudflare
The problem with ordinary CDNs, is that they involve an additional domain lookup since your static files are hosted on another server. This DNS lookup introduces another delay that’s only partially mitigated by pre-fetching.
You can mitigate this by using a CDN that also functions as a reverse proxy, such as Cloudflare. The best part about this is that it’s free! Cloudflare’s free tier provides amazing value, and far outstrips other offerings like StackPath and Fastly who also have reverse proxy services. With a Cloudflare CDN, there’s no additional domain lookup, and this helps load your webpages quickly, while still getting the benefits of a CDN.
Fortunately, when you buy a Hostgator plan, you automatically get access to Cloudflare integration. All you need to do is access the icon in cPanel, enable it, and you’re done! Here’s a screenshot:
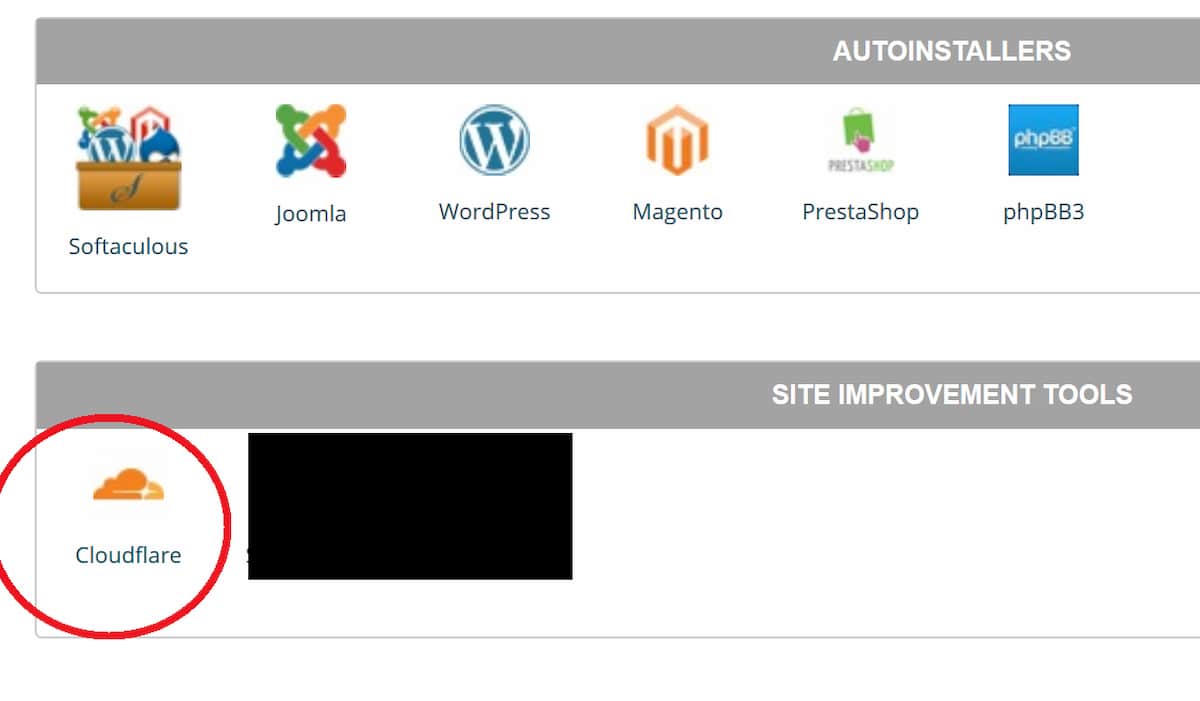
As a bonus, Cloudflare also protects you from DDoS attacks, malicious robots, and more. In my opinion, it’s the single biggest boost you can give your website if you buy a cheap hosting plan like Hostgator.
The website WP-Tweaks.com has repeatedly asserted that Cloudflare is the single best CDN system despite being free, and the numbers back this up. They once did a comparison between Cloudflare and other popular retail CDNs like KeyCDN and BunnyCDN and found that Cloudflare’s free tier has the same cache retention policies compared to paid services (around 2 days). What more can you ask for?
4. Switch to a Faster DNS Name Server
Hostgator’s DNS servers are pretty decent, but they’re not amazing. For maximum speed, you should (once again) switch over to Cloudflare’s DNS servers. According to the website DNSPerf, Cloudflare consistently ranks higher than any other DNS system. Here’s a screenshot of their resolution times vis-a-vis the others:
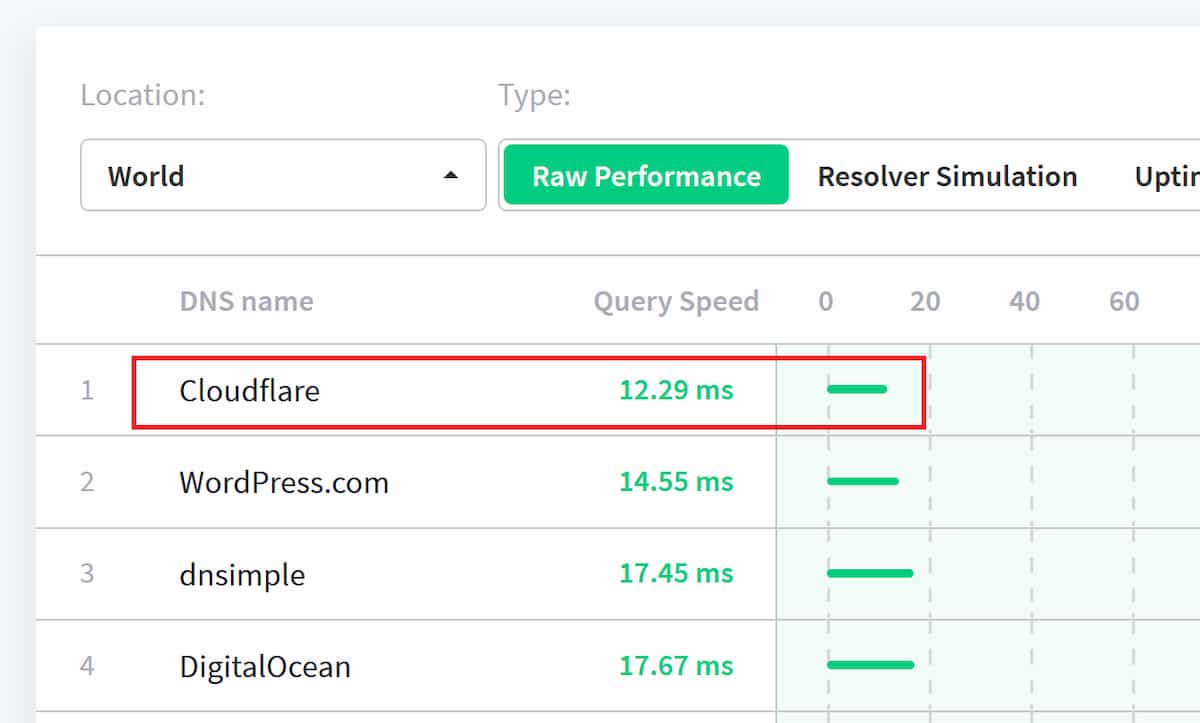
So when you combine Cloudflare’s DNS performance with their free CDN, it becomes pretty much a no-brainer. However, when you buy Hostgator, it won’t switch the servers for you. You need to do that manually. But believe me, the additional performance benefits are worth it.
5. Implement Dynamic Page Caching
Page caching isn’t enabled by default when you purchase a Hostgator plan. Only their WordPress packages have server caching. This means that if you bought ordinary web hosting, you need to install a plugin that does the caching for you. W3 Total Cache for WordPress is a great example, but there are others.
HTML caching allows your server to generate static HTML pages that it then servers to subsequent visitors to your site, dramatically speeding things up. It’s pretty much an essential feature if you’ve bought low-cost hosting from Hostgator. It helps make up for the limited database and CPU resources that you otherwise have access to on shared hosting.
Summary
These 5 tips will help you stretch your low-cost Hostgator purchase as far as possible. With these implemented, you can approach the performance of much higher plans. Of course, there are limitations to how far you can go with them, but they’re a good start, and will help you service a far larger number of visitors than would otherwise be possible when you buy a Hostgator package.


